|||
|||
Today and yesterday it’s been snowing like crazy — a good time to update. It was a very busy week in the ‘studio’, though I was mostly running between shops at the Port campus. A pair of projects:
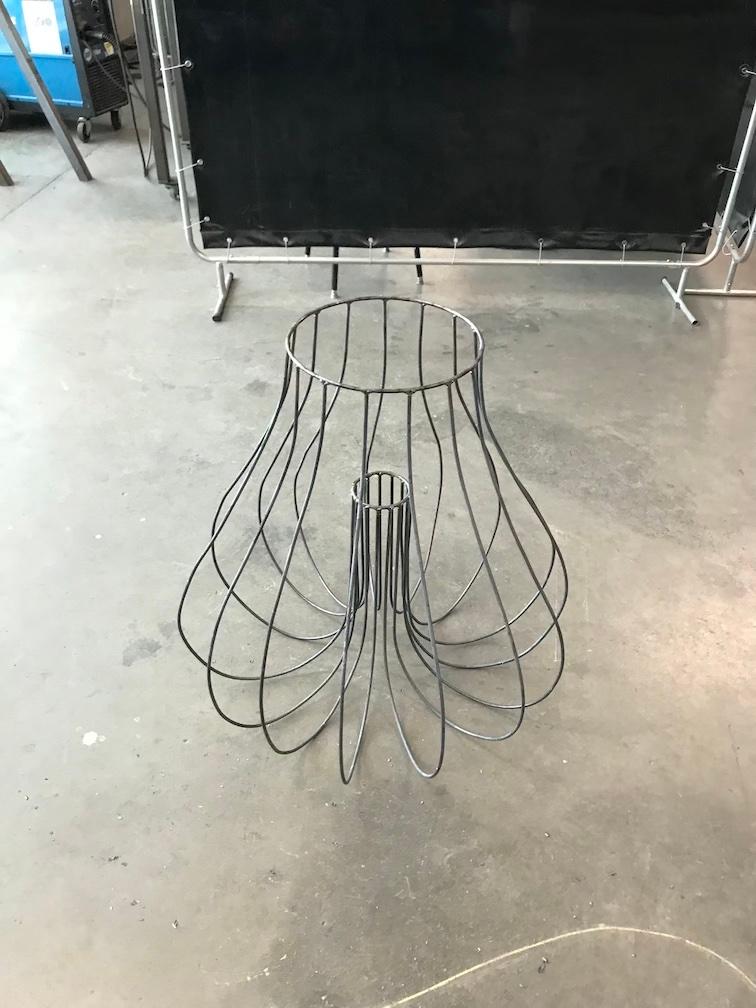
Worked with Donnie, the tech at the metal shop, to make an armature out of 1/4” steel. Very happy with how it turned out! Here’s the process:
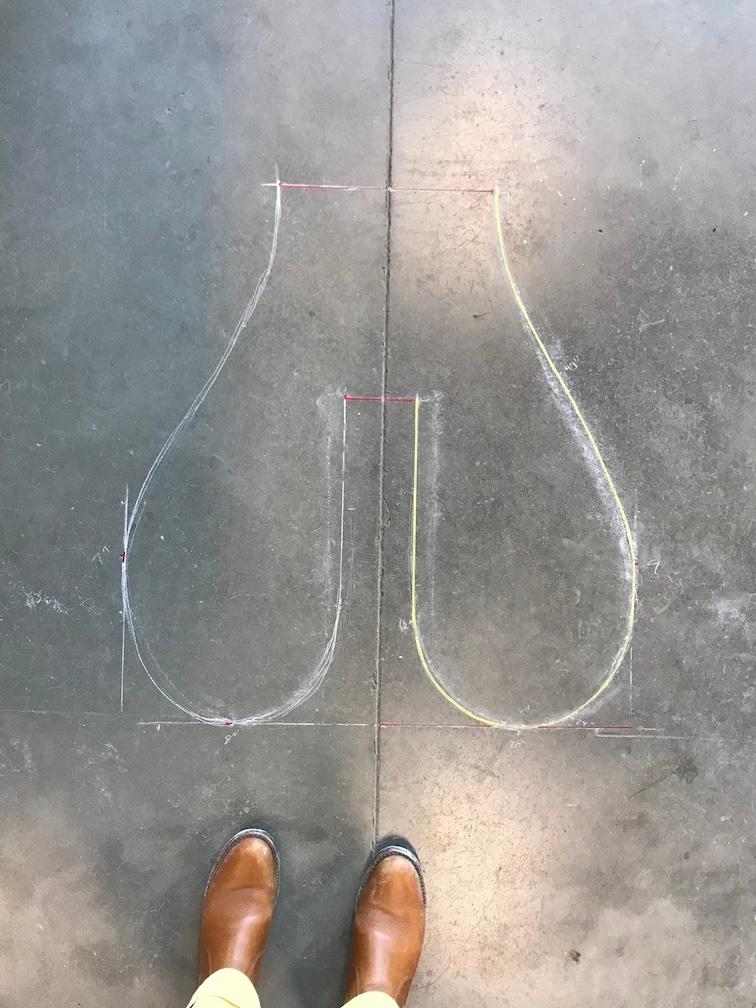
Drew out the silhouette, cross-section of the form. Took a bit to get the dimensions right. Used the yellow curve on the right as our template.
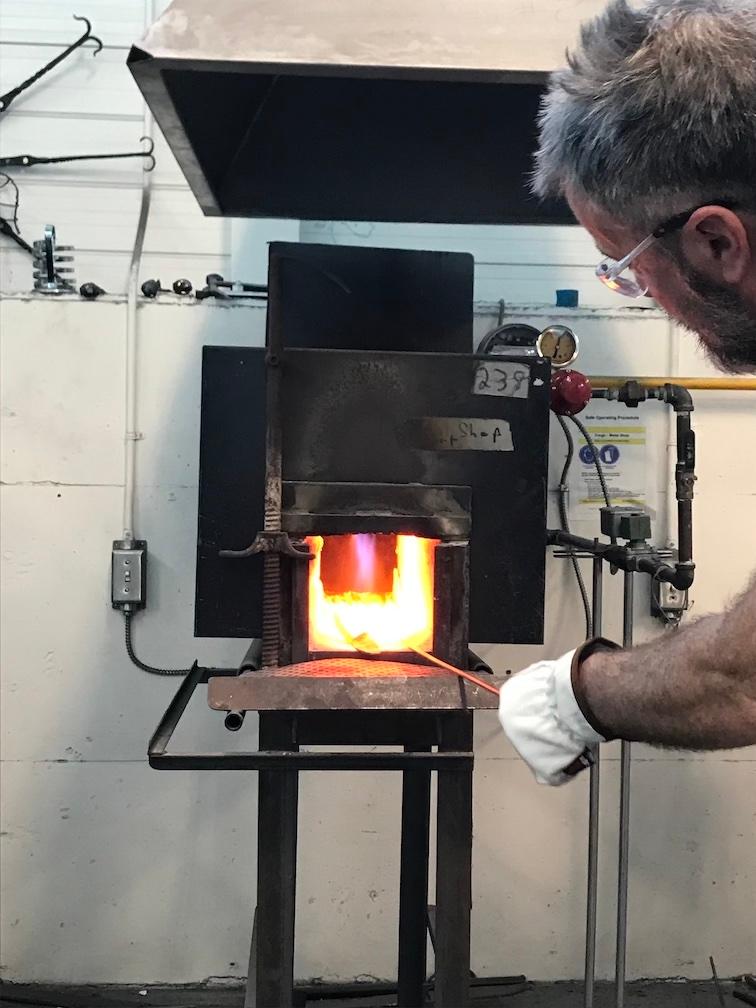
Cut the 1/4” steel wire to length and heated it until red-hot in the forge (above). It was then soft enough to bend using the welding pliers. Definitely a two person job. If we had to make a lot, a jig would be the way to go, so that one could easily bend them to consistent shapes. As is, we got the hang of it over time. It reminded me of working with Paths in Illustrator, trying to keep the number of anchor points low.
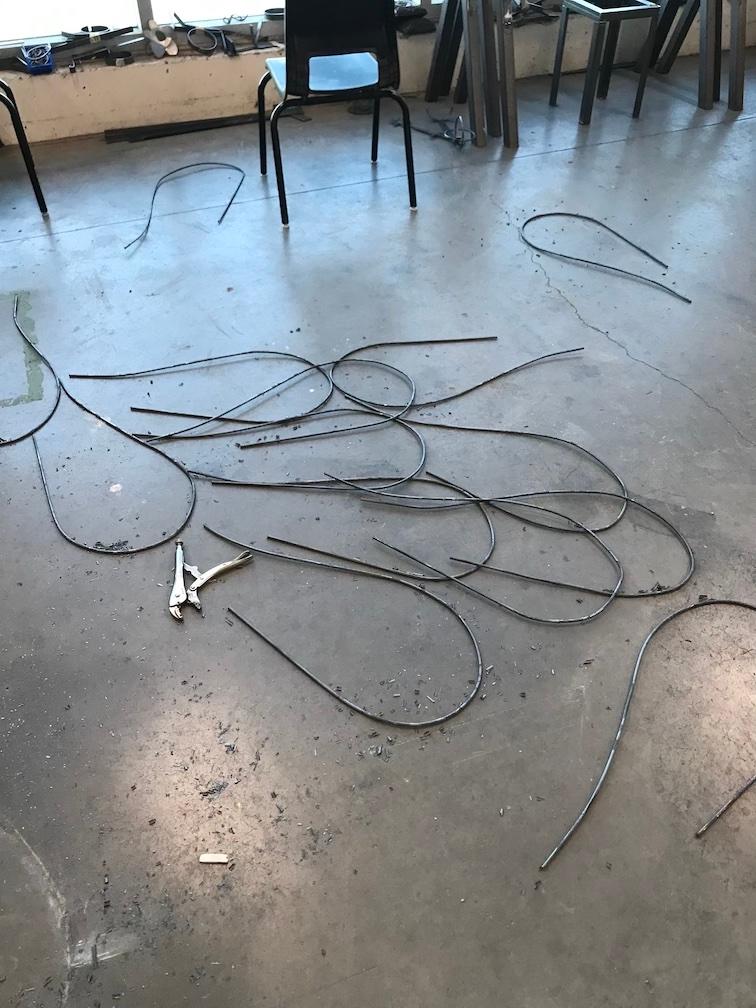
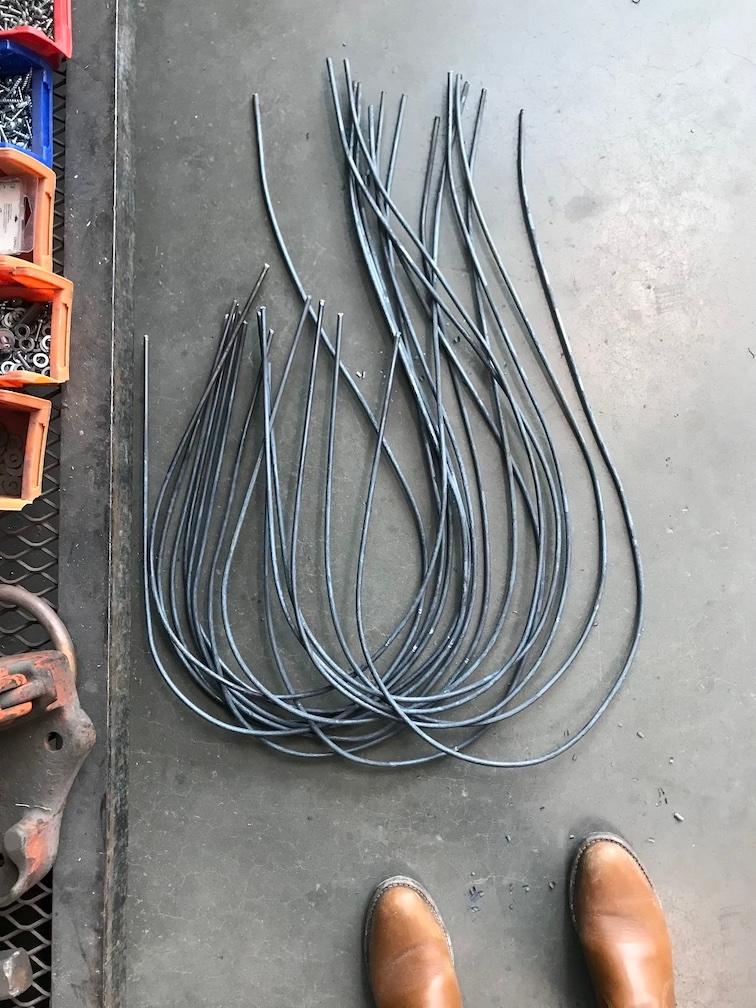
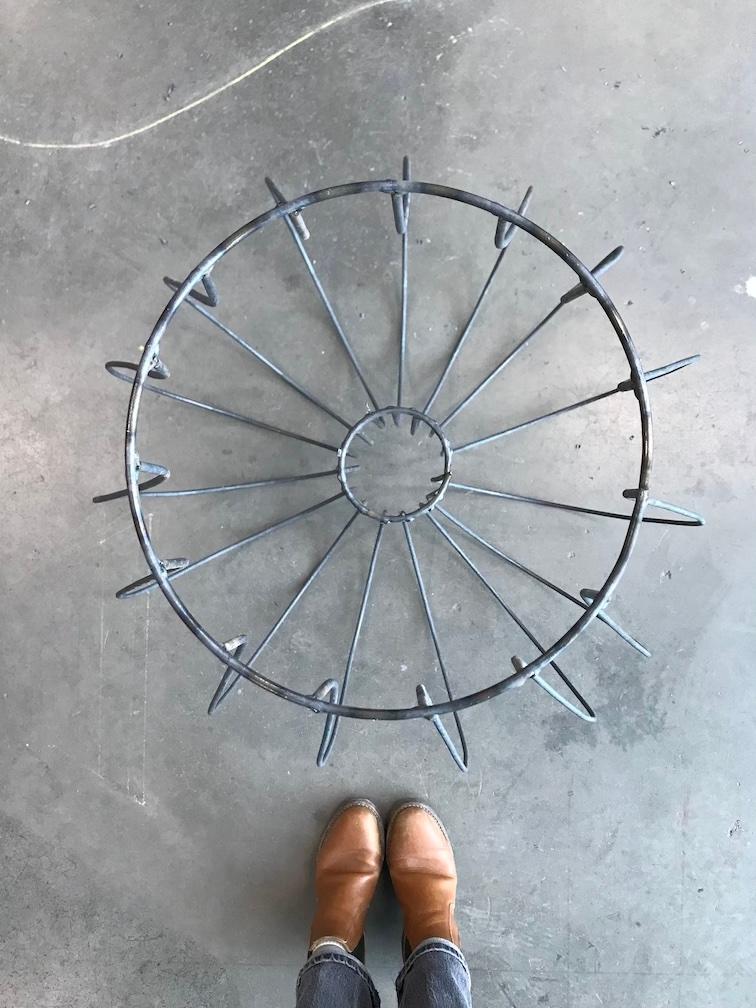
15 in total. Not pictured: cutting and rolling wire for the cap ends, in 12” and 4” diameter.
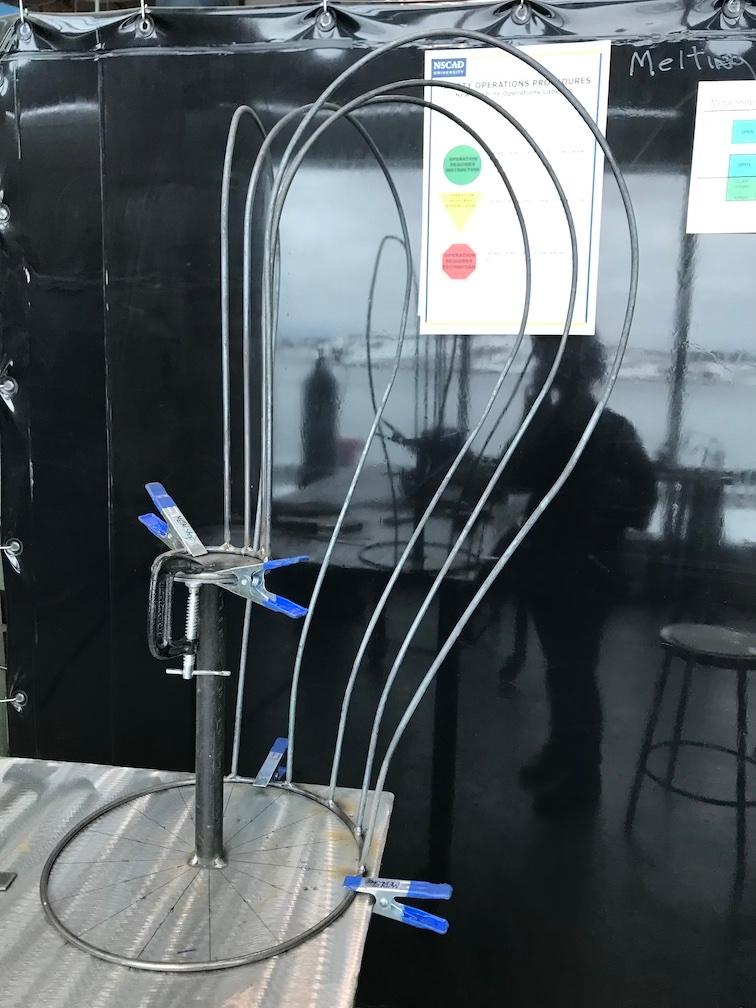
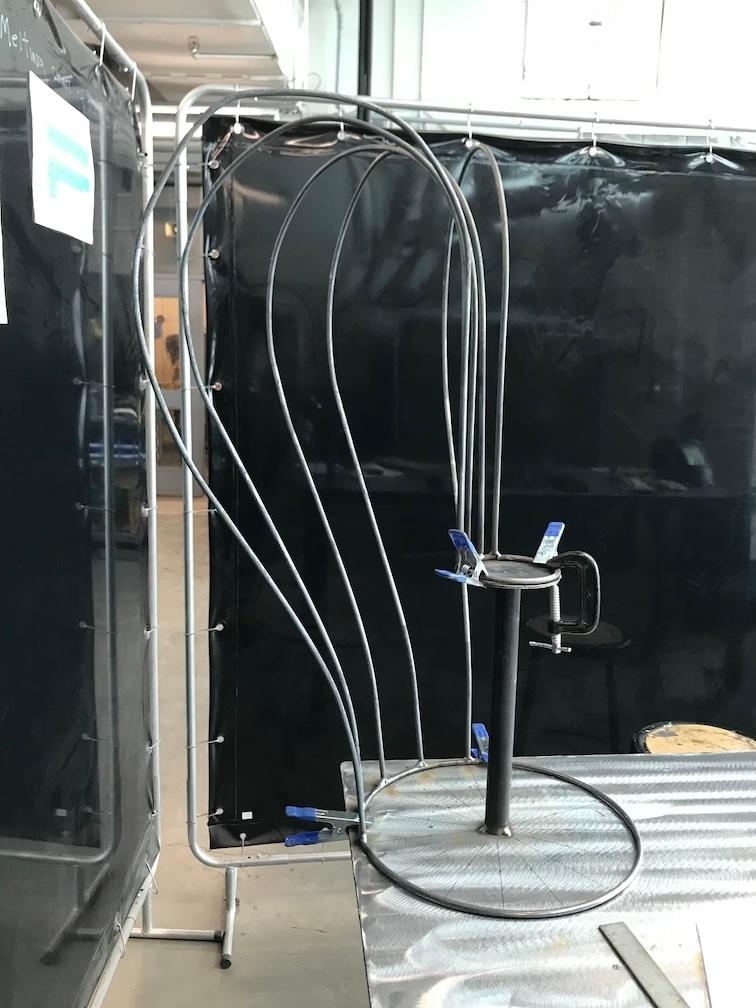
In progress assemblage. Donnie had the bright idea to make a stand the height of the difference between the two ends, then welded it to the welding table top. He would hold the vertical strut in place, and then I would spot weld both ends on either side. Worked well! Some contortion required.
I was using a MIG welder, which basically uses electricity to melt the flux (in trigger-controlled nozzle thing) and the metal together. The whole metal tabletop becomes part of the circuit, as you clip on the ‘ground’ connect. So cool!
Finished! I’m planning on weaving materials and other wires through horizontally. Not quite sure what will end up happening.
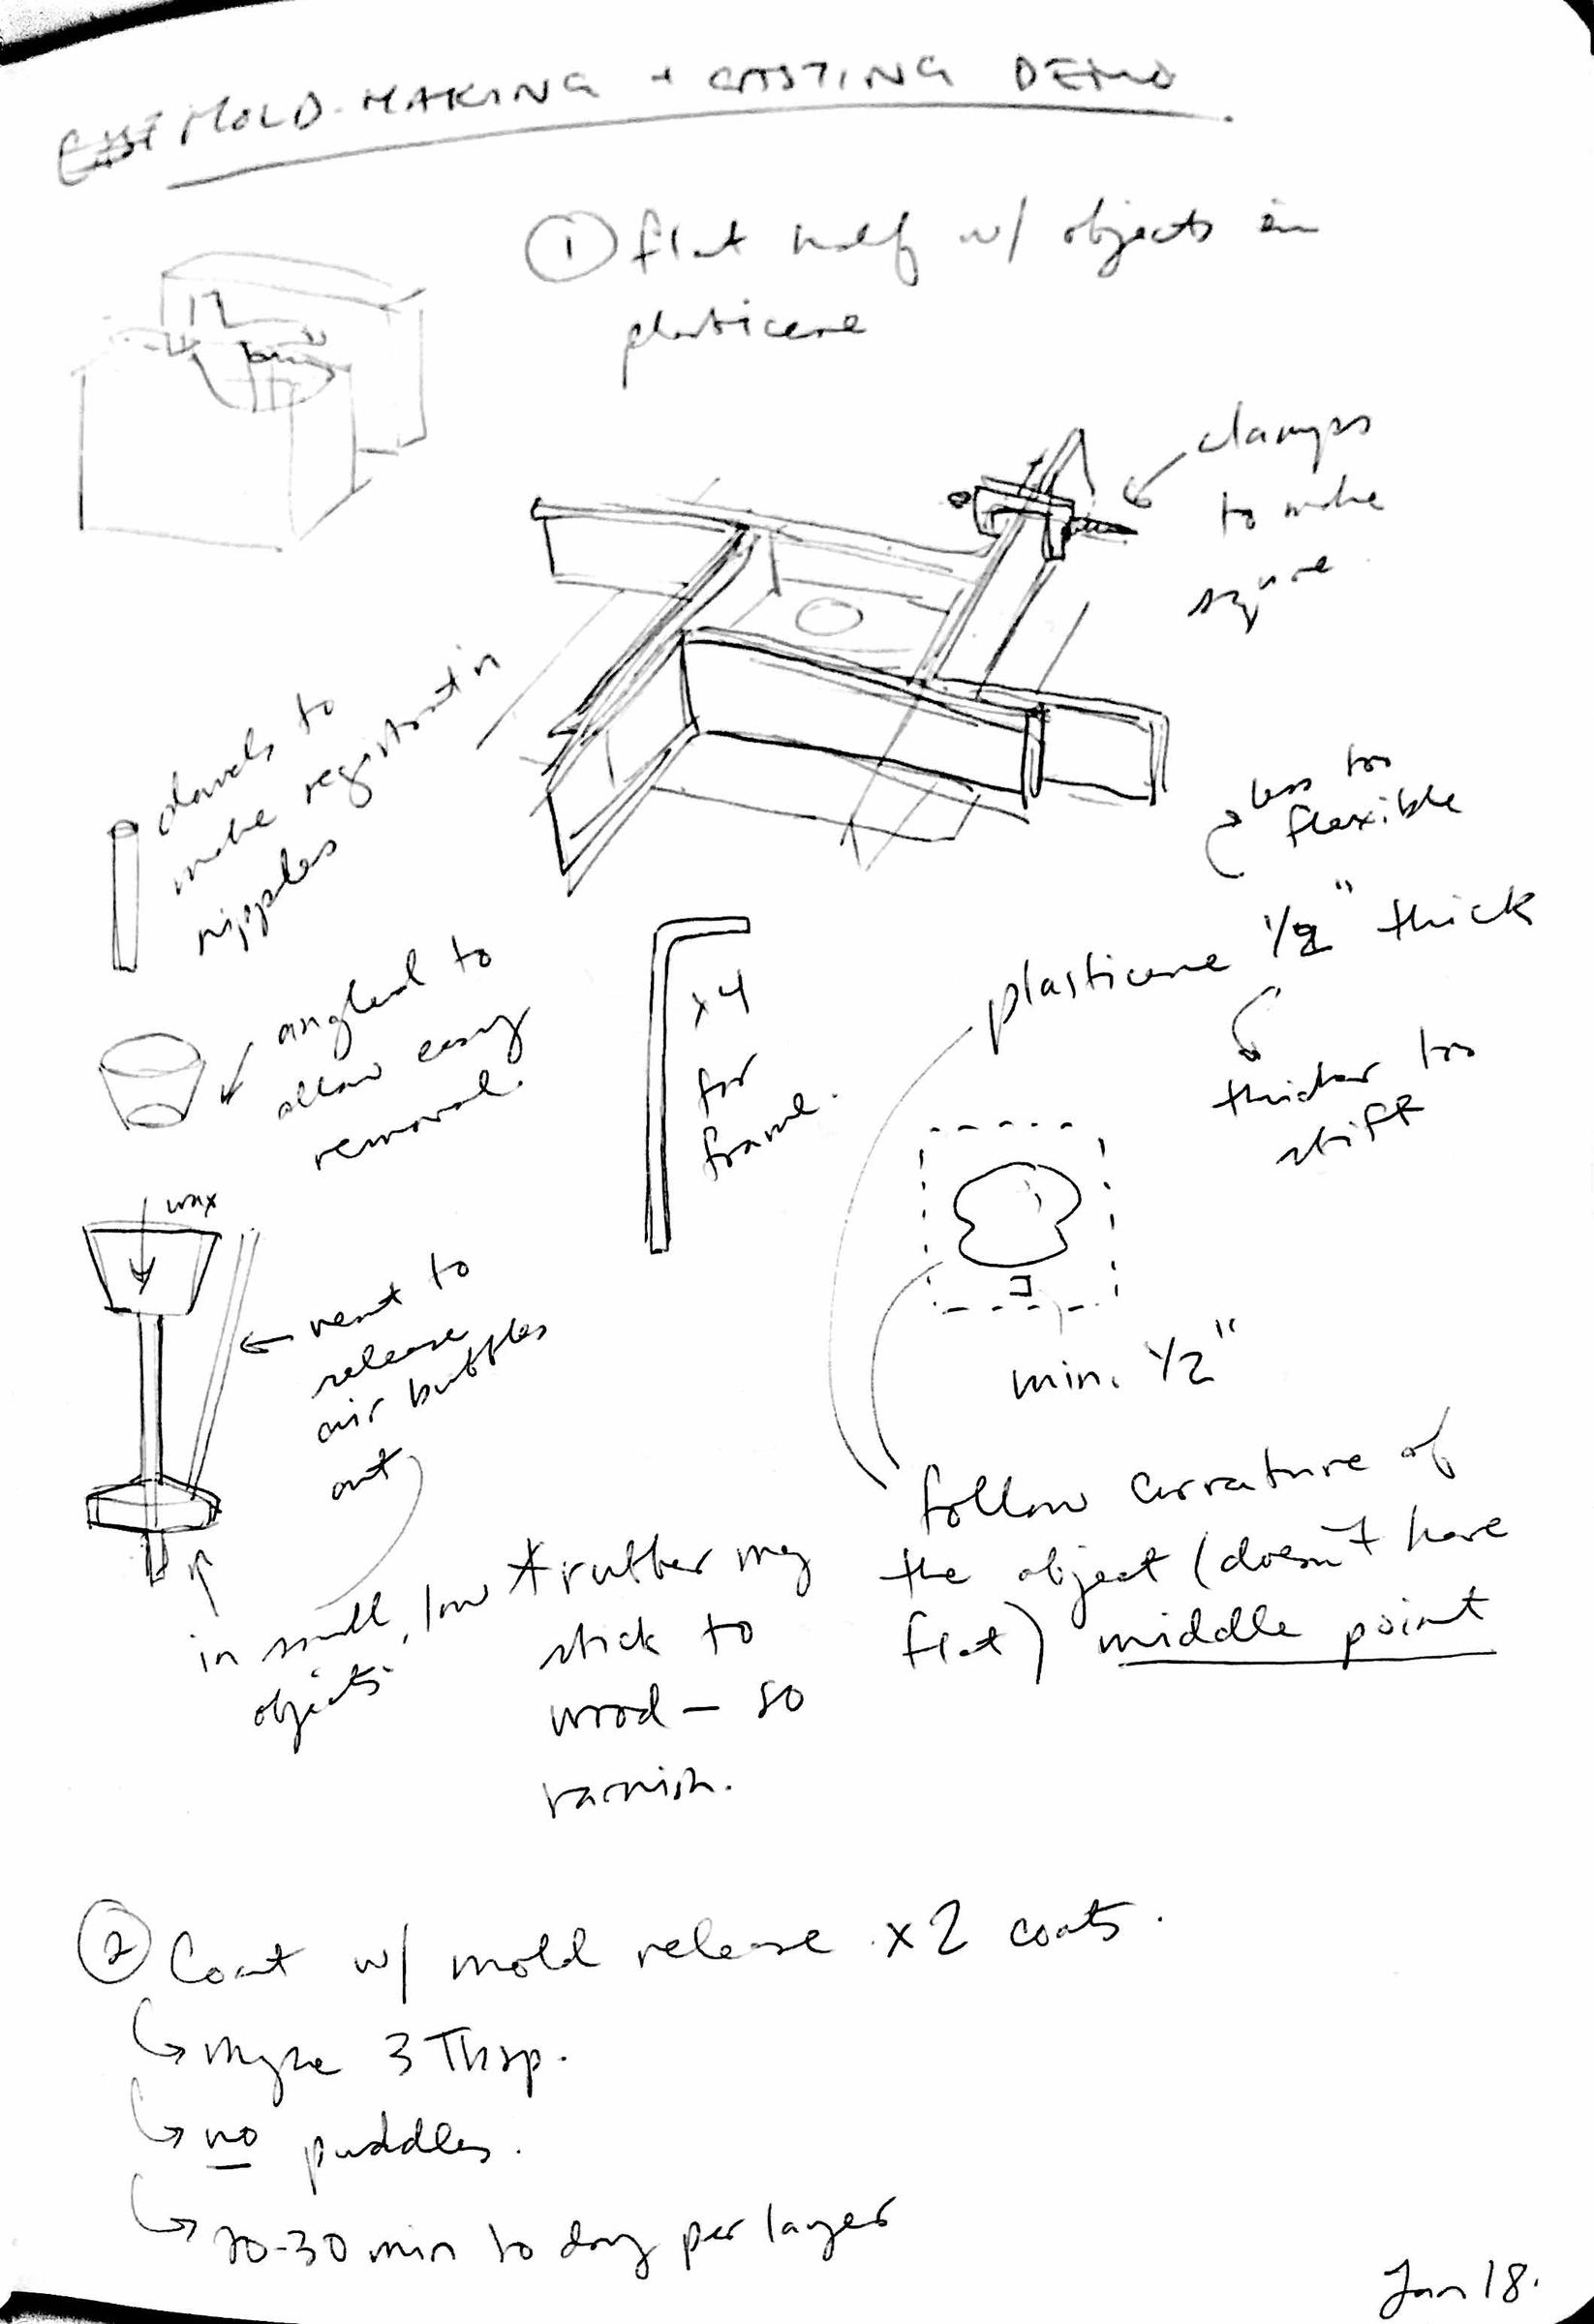
Had the opportunity to sit in on a demo about making two-part molds, by Steve Higgins. Excellent! I had only made simple cup-molds from silicone, where you cast the mold block and then cut into it. A bit chancey, and not as reliable as this, afaik.
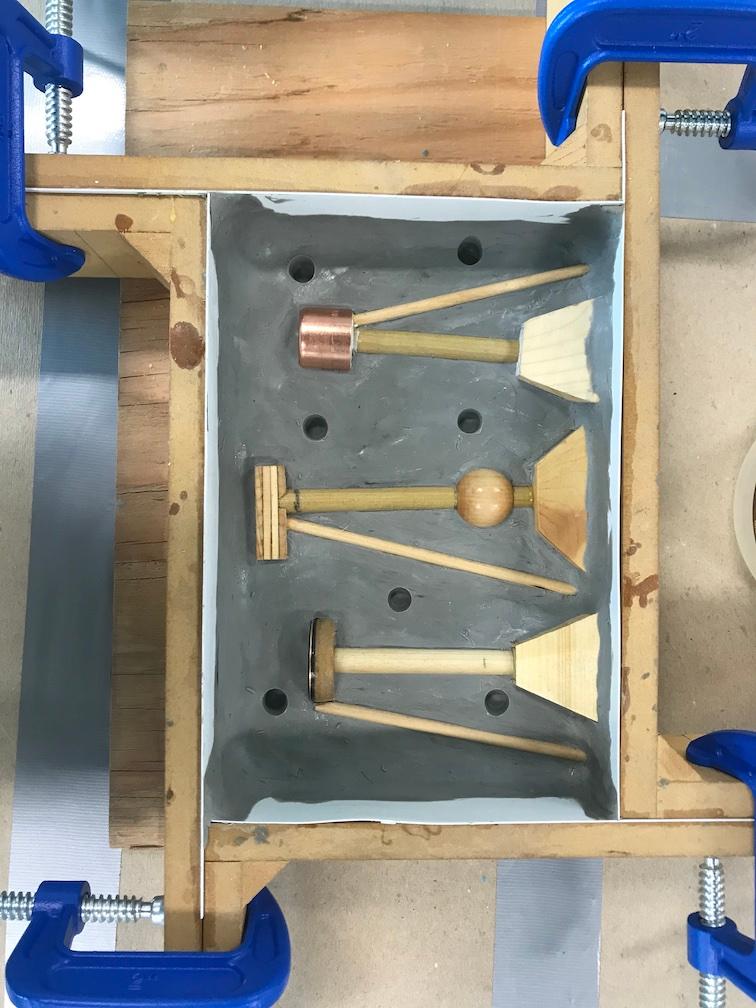
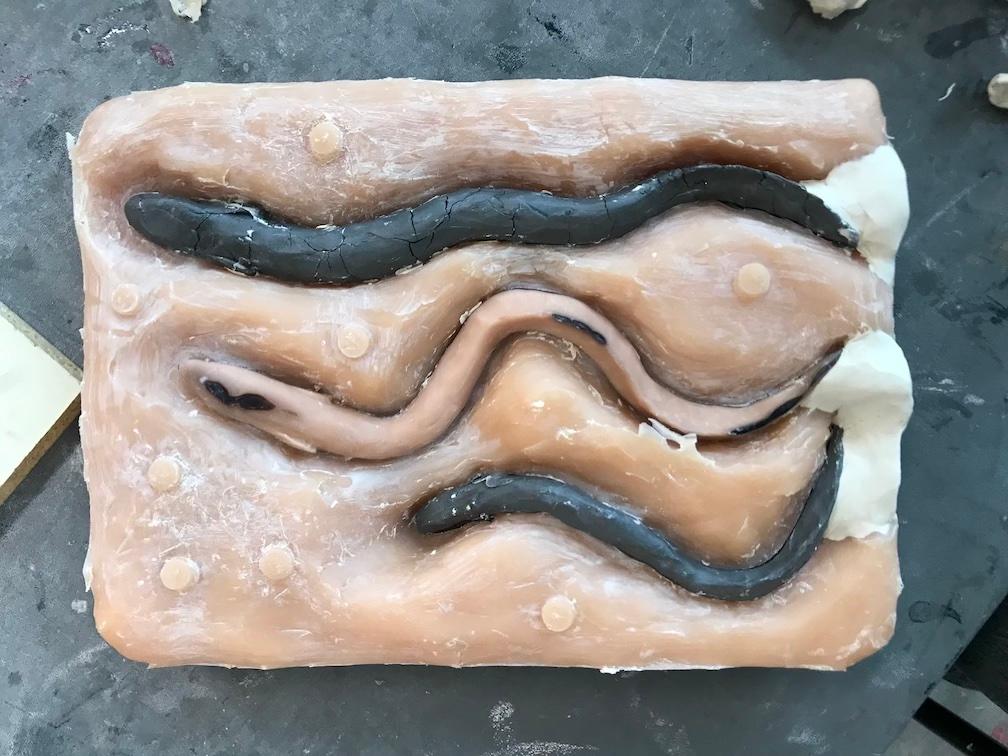
Steve’s demo. L-shaped brackets are clamped together to form walls, then a 1/2” layer of plasticene goes down and up the corners to seal. The objects are then placed in and submerged with plasticene halfway. You can see the trapezoidal wooden blocks, this is actually to create pour-points in the mold, for when you’re casting. The skinny, angled sticks are vents: to let the air escape later on, while casting. Because of the shape of his objects, air bubbles may form while he’s pouring in the liquid, so the vents are handy. (I should have put vents into mine, too!) The dots are registration nipples. You’ll see what I mean in a bit!
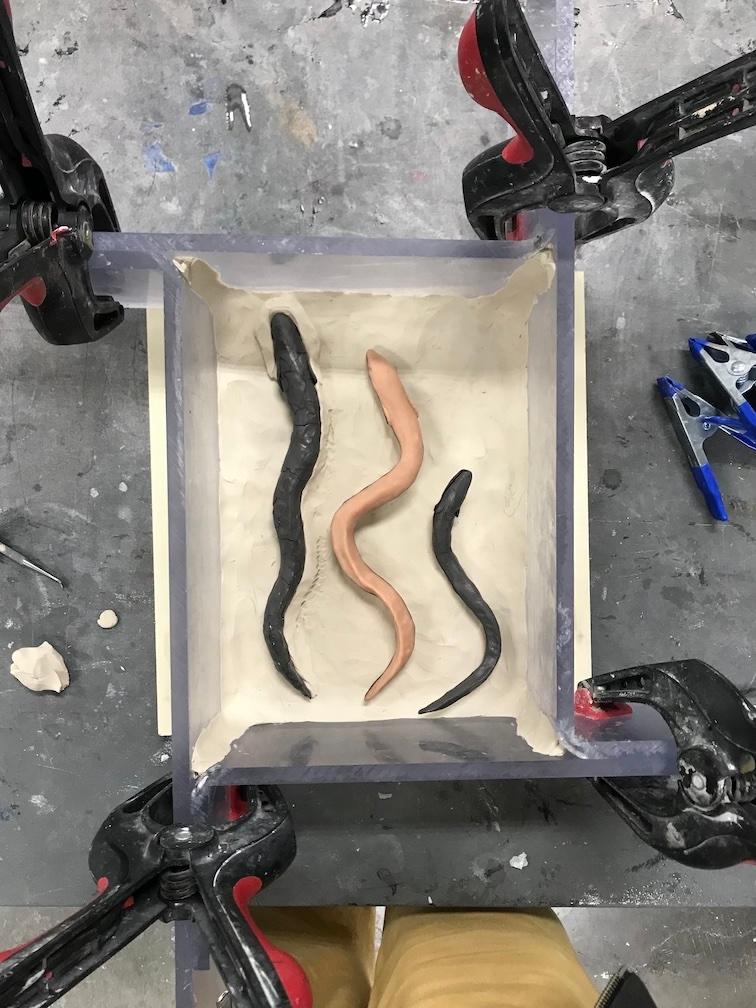
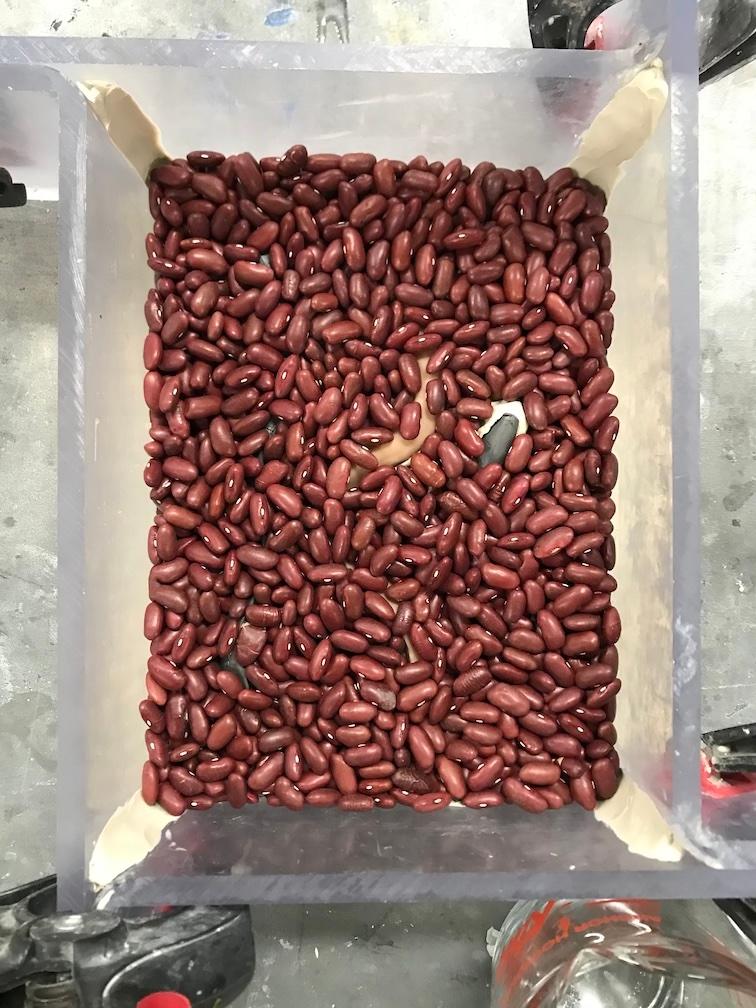
My little eel buddies, submerged.
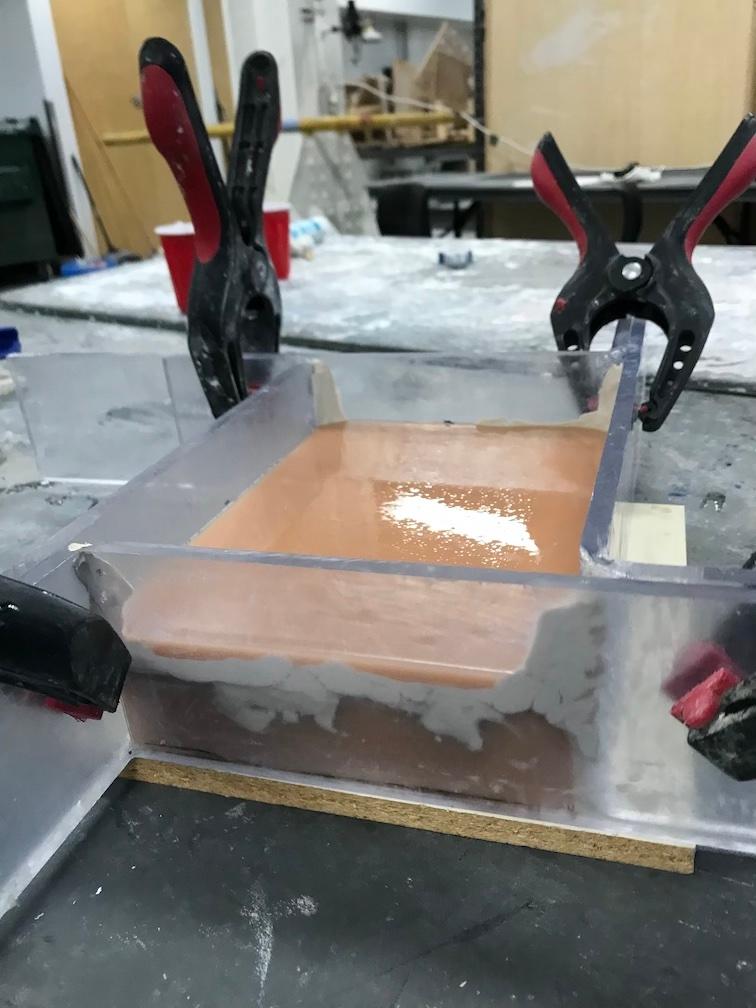
Using beans to measure the volume of the space in order to calculate how much rubber to mix up: fill with beans, and then remove them into a measuring cup. Keep track of how many cups. I also put 1 cup of beans into the solo cups I used to measure and pour the mixture parts A and B, and marked how full it was on the cup. My mold was quite large!
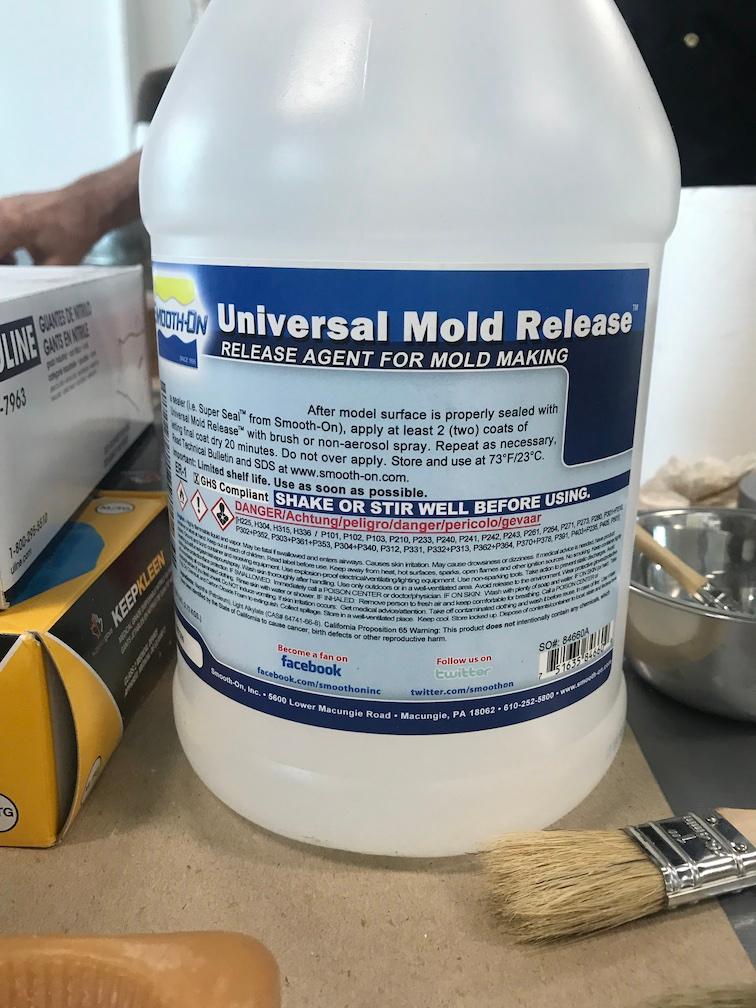
Coat the interior of the mold in mold-release agent, x2 coats and let dry. (I just did one– was fine)
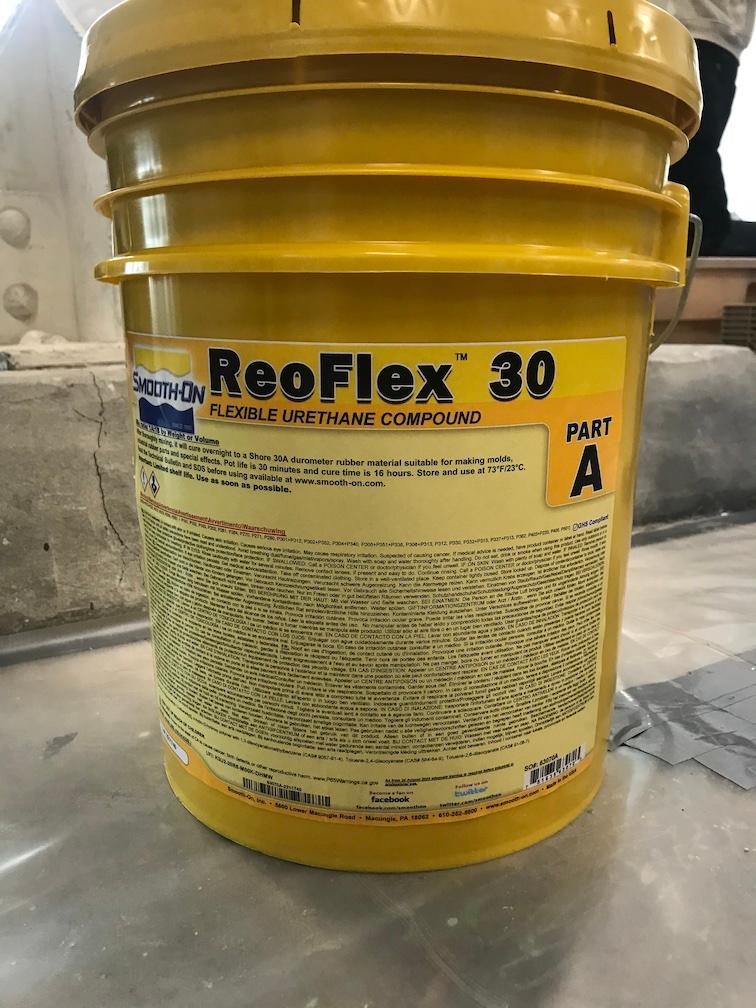
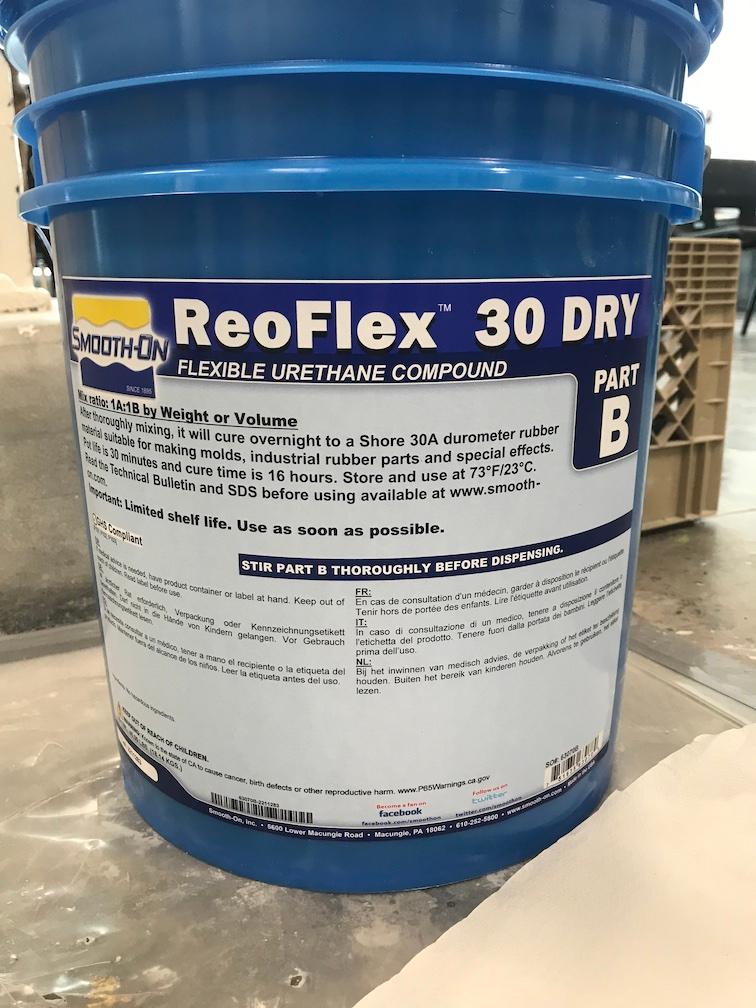
We used ReoFlex 30 by Smooth-on, a urethane rubber. It’s a two-part, 1:1 mix. You want to add the thinner, more viscous part first, then add the thicker part second.
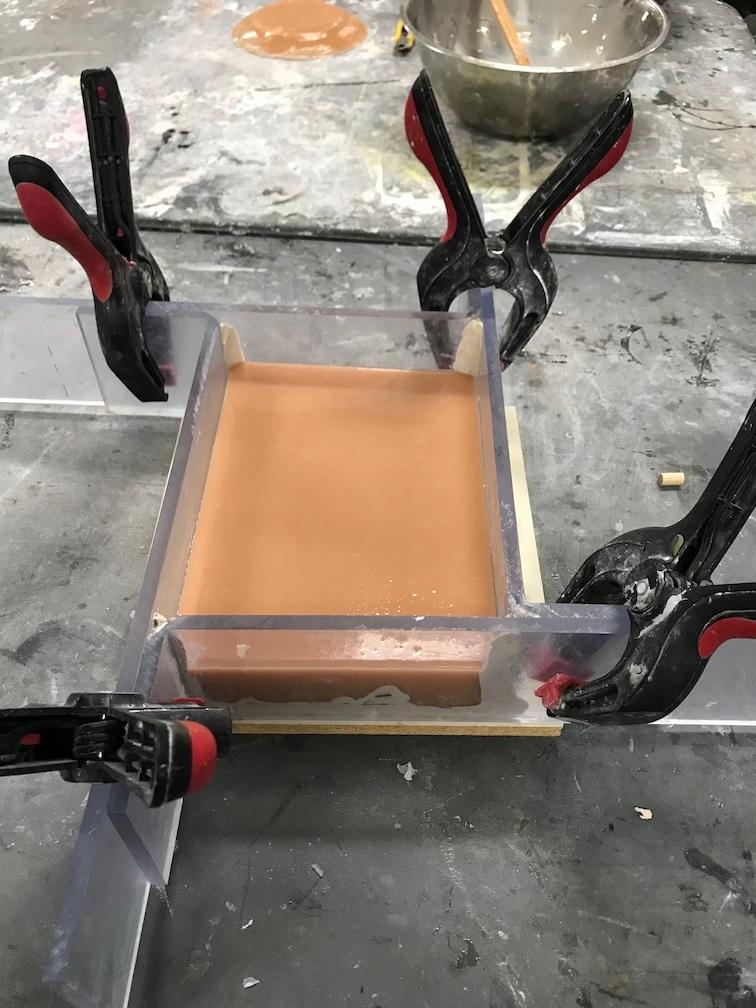
Then pour!
Wait 12-24 hrs and demold:
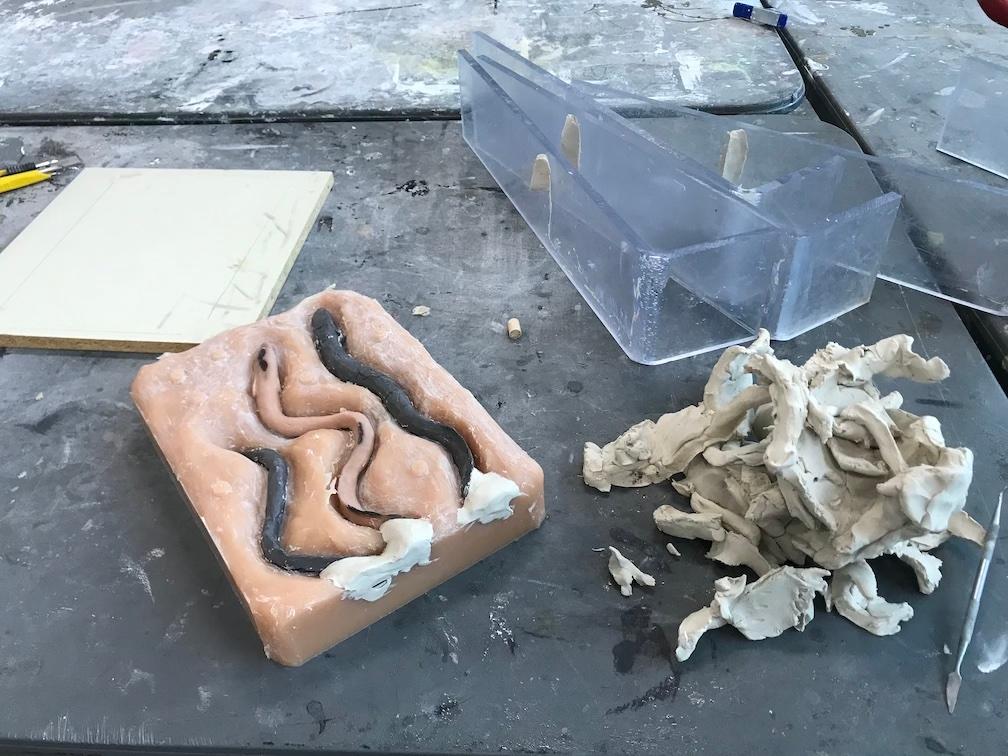
All cleaned up. You can see the indents become nipples. When you pour the second half, they create their negative, thus creating little locks. You don’t remove the objects. I added more plasticene at the tails to widen the pouring vents.
Then you do the same setup, just with the set rubber Part 1 on the bottom!
I haven’t been able to get to the school yet to check how the second part turned out!
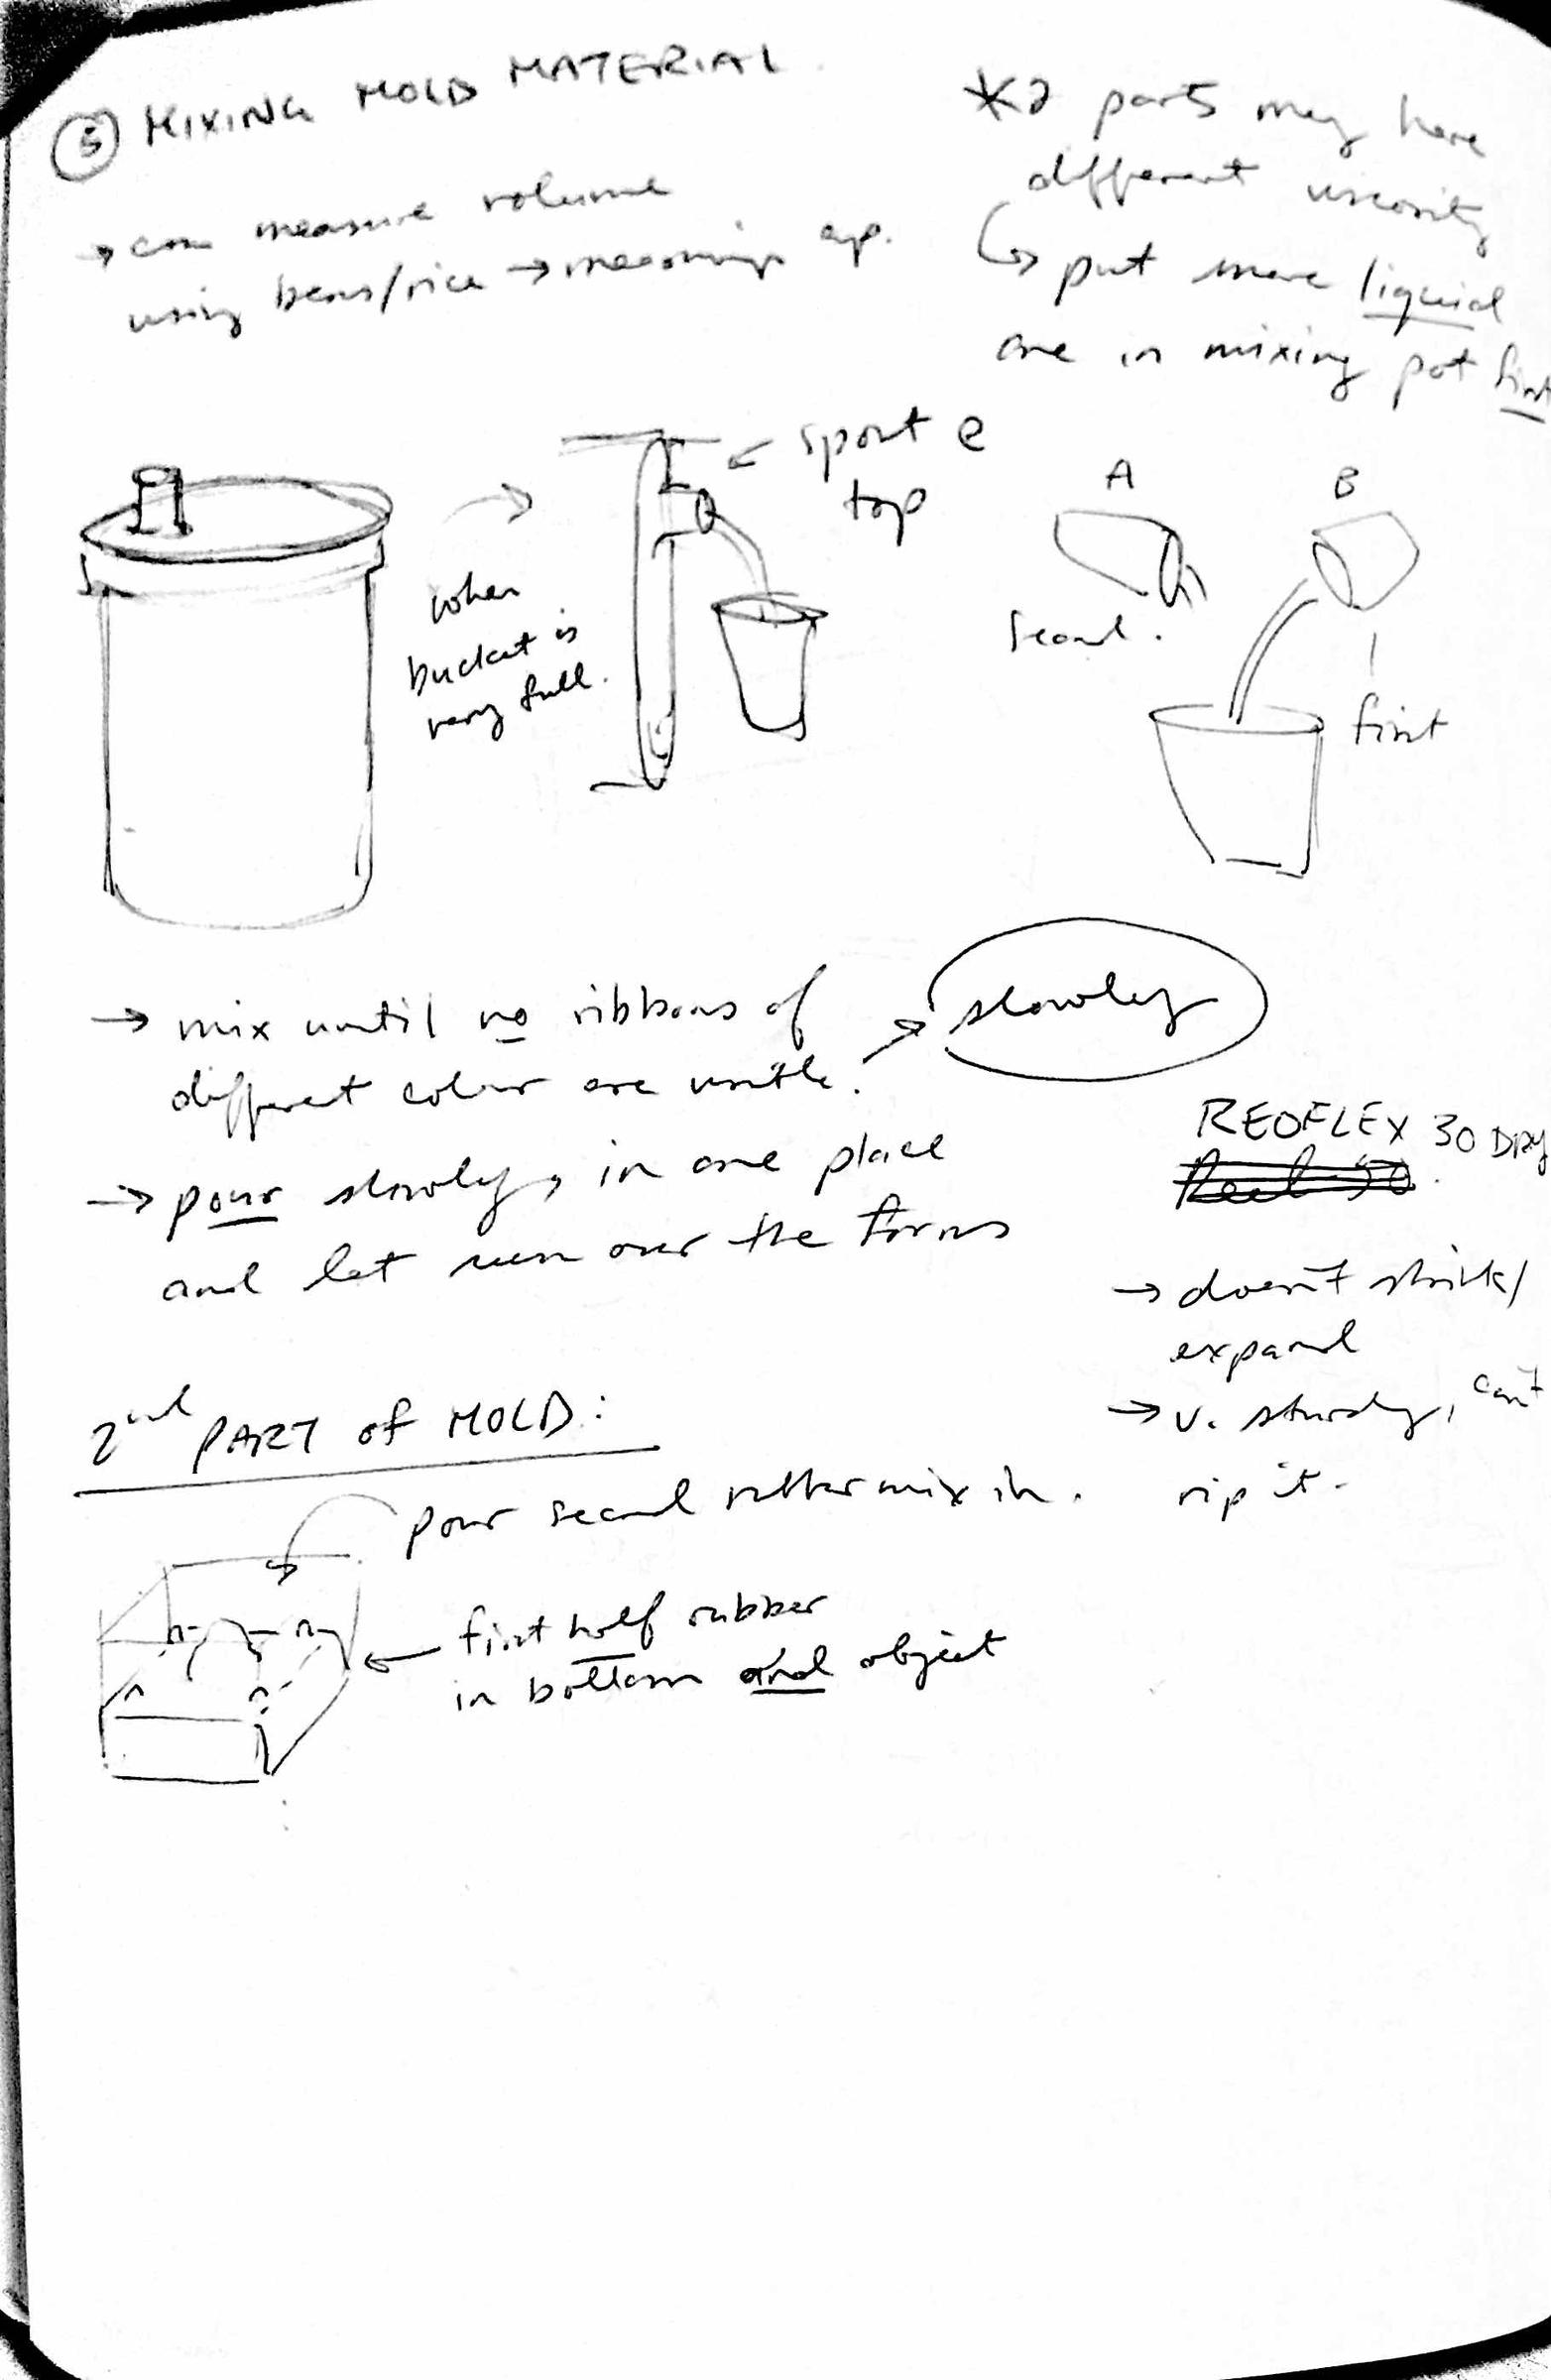
Here are my notes:
(View from the metal shop)